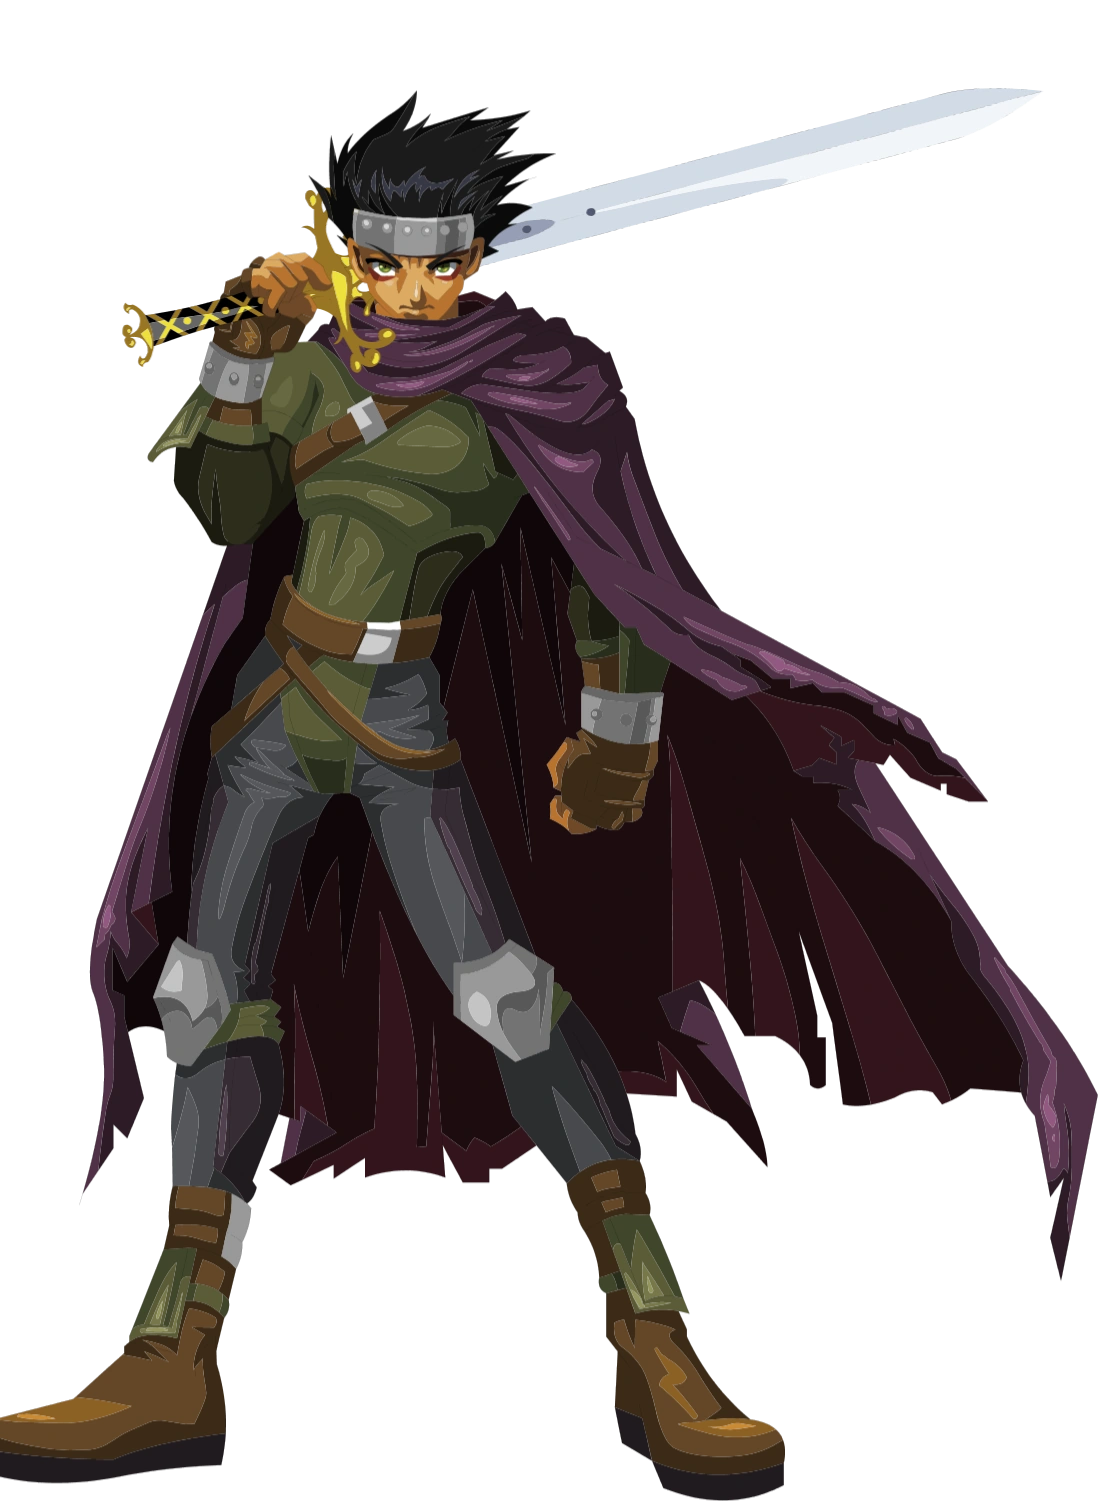
The first part of DragonFable's storyline revolves around the Hero trying to get their Dragon Egg. The later halves are focused on trying to save all eight Elemental Orbs before Sepulchure steals them.
Note: You may or may not follow this story as it is!
Journey to Falconreach[]
A Hero is Bored[]
"Thank you for saving me, brave <class>. Might I know the name of my hero?"
"But priestess, you said their name is <name> and they are the one destined to save the world!"
*blink "What?" - Lady Celestia, Twilly, and the Hero
Drakath, Exiled Prince and Leader of the Darkwolf Bandits
The Hero begins standing on a cliff enjoying the nice view when suddenly a giant red dragon appears. The distraught Hero prepares to fight, but the dragon lowers its head, revealing a priestess carrying a black box and Twilly, a red Moglin. They walk away and leave the player alone. Then the Hero hears a scream and rushes over to find that the priestess is being attacked by a gorillaphant and that Twilly has been beaten. He is punted and lands at the hero's feet, so they can decide whether or not to help him (gain as a pet) or punt him back.
The Hero quickly defeats the beast and then is given the task of telling Captain Rolith of Oaklore Keep that the priestess will be taking a shortcut. Rolith initially does not pay attention to the hero, so they need to do some quests for the Keep's knights.
The Black Dragon Box[]
"Impossible! You got lucky this time, <class>!"
*snort* "Oooh box!"-Drakath and a wandering Sneevil
When he finally listens, he panics and sends the hero to protect her. They catch up to her just as she comes under attack by a man named Drakath and his bandits. Drakath reveals that the Black Dragon Box is the key to regaining his throne before insulting the hero. He and the bandits fight the hero. The player wins and rubs it in Drakath's face, causing him to vow revenge. Unfortunately, while they are busy smack-talking, a Sneevil - a box obsessed goblin - steals the Box and runs away. The priestess teleports back home, instructing her savior to go to Falconreach and find Twilly.
The Hydra's Boss[]
"Serpent...Sir Pent...Heh, I get it, very funny...too bad though...I was hoping for a good boss fight..." - The Hero
The hero enters the bridge leading to Falconreach. Everything seems calm at first, but the boss of the Hydras, Hydrahok, pops out the bridge with its minions, not letting the hero to venture forth. When defeated, the Hydra falls back into the ocean, its head lodged in the hole it made. The hero crosses over into town.
Falconreach[]
The hero meets the Mysterious Stranger in the outskirts of Falconreach. He tries to persuade the player into getting a Doom Weapon. In Falconreach, the hero meets many of the game's NPCs and has access to various stores. They can now also travel to Lymcrest, Surewould Forest and many other places.
Dragon Assault on Willowshire[]
Willowshire Burns![]
The hero, Ash and Robina are sent on a mission to help Guardian Fortuna of Willowshir protect her town from the terrible dragon Gorgok. They defeat the army, finding info about the only things that can weaken the dragon and force to heal for a very long time.
Race to the KeyGems[]
"If you are ever tasked with building a secure vault...be certain to put door handles on both sides."-Lord Valorus
The team are sent to find the KeyGems that can defeat Gorgok, defeating some of the dragon's minions along the way. After some time, the hero stumbles upon the secret catacombs and meets Lord Valorus, the ghost of a Guardian. He says that he's been waiting for the hero for nine hundred and eighty years. Unfortunately, they are one day late. Confused, the player asks him what he is talking about. Valorus explains that he accidentally sealed himself in the Tower nearly a century ago. He also reveals that Guardian Towers were created to protect "powers". (The Elemental Orbs) Gorgok's army was probably attacking Willowshire to get their "power". (The Stone Orb) However, it had apparently been stolen just before their arrival, by Valencia.
If the player has a Dragon Amulet, Valorus will tell more of the Guardians' history and cautions the hero to be careful, stating that they'll need luck if things go "like last time".
Slay Gorgok![]
After finding the basement was empty, the Hero proceeds to vanquish Gorgok, but he survives and retreats to heal his wounds.
Friday the 13th, Part I[]
Friday the 13th Invasion[]
Falconreach is invaded by undead monsters wearing special types of hockey masks. The hero defeats the army, wanting to know who caused this. Zorbak casually states that "the necromantress" did.
The 13th Mystery[]
The boss is known to be the Deadwood Destroyer. The hero defeats it but says it will come again for its revenge.
Pumpkins Invade[]
Night of the Living Pumpkins[]
A place known as Amityvale is attacked by Pumpkin Slices and is commanded by the Necromantress. The hero is sent there to defeat all the forces.
The Pumpkin Patch[]
Lugosi and Rosemary orders the hero to go to the near by pumpkin patch. The forces were coming from there. The hero tracks the entire place down finding
the Gourdking summoned by the Necromantress to destroy Amityvale. The forces are finally defeated but there is no sign of the Necromantress.
Pumpkin Pi Bomber[]
The hero finds the Necromantress with the help of the evil Zorbak who starts liking her. She summons the Pumpkin Golem to fight off the hero. The Necromantress leaves and Zorbak gets scared and leaves, too. The hero defeats it and the war is finished.
Mystery of Amityvale[]
Well, Well, Well[]
In the Amityvale graveyard, the hero encounters Artix the Paladin fighting some zombies. After cracking some puns, they manage to defeat them, and the hero goes on their way.
Eventually, while travelling east, the Hero meets Daimyo, Artix's dog. After some brief confusion, they learn that Artix has fallen down a well. Worried, the hero investigates and is answered by a harried undead, which Artix promptly defeats offscreen. After jumping into the well and fighting some skeletons, The Hero reaches Artix, who has been held in non-traditional captivity. Artix reveals that the Necromantress tricked him into jumping inside. The Hero and Artix team up to defeat the boss, Bad Bones.
Amityvale Invasion[]
The spooky town of Amityvale is attacked by vampires. It is revealed Sepulchure is part of this. The hero is once again trying to defeat the forces.
Haunted House[]
Thursday standing in the front of the Amityvale Inn
After the forces gone, the hero tries to find out this mystery. A girl named Thursday told the hero to explore the house near the pumpkin patch. The hero defeated some spirits and needed a key to open the doors. The hero goes to a greenhouse and saw a vicious plant named Awdreetoo wanting to eat the hero. After killing that monster the hero get the keys. The hero opens the locked door and battles Underbed. Finally, the hero goes to the room with the pendant. The hero has to fight Nightshade, who has some info about Sepulchure. The hero returns the pendant back to Thursday.
Crystal Clear Lake[]
The hero is now asked to go to the near by swamp and find Lon. He was the messenger of the one who started the Amityvale Invasion. The hero clears the swamp monsters and finds Chaney giving him something that would make the Doom Weapons' power rise in the next Friday the 13th. After defeating Lon, it is revealed he was once a human and got turned into a werewolf somehow.
Yaga Stone Circle[]
Thursday now asks the hero to go to the stone henge and clear out the Yaga Sisters trying to summon the Strange Outworlder for their boss to destroy Lore and most importantly, Amityvale. After defeating the Yagas, Guffer the Strange Outworlder comes to life. He was just a kind creature but when he finds out he is scary, he gets mad and wants to kill the ones who created him. Eventually the hero destroys Guffer and finds the note about the boss.
The Vampire Tower[]
On the way, the hero confronts the Necromantress telling them that if they kills some straggling werewolves for her, she will clear out the fog. The hero reluctantly obliges. Now that the fog is out, the hero travels to the Vampire Tower and fights Lord Frydae XIII (Lord Friday the 13th) who is the boss behind the invasion and Great Great Great Great Great Great Great Great Great Great Great Great Great Great (13 Great) Grandfather of Thursday. The Necromantress served him, but now she serves another one (Sepulchure), and Frydae wanted to turn Thursday into a vampire. After he is defeated he transforms into a rat and vanishes, but the town of Amityvale is in relative peace... for now.
Ice Dragon Invasion[]
Winter is Wild[]
Suddenly, Dragonmaster Frostscythe attacks Falconreach to get the power from the Falconreach Guardian Tower. There is a bunch of ice monsters and another war starts.
The Ice DragonLord[]
The hero battles Frostscythe and his dragon, Glaisaurus. They defeat him and destory his Dragon Amulet forcing him to try to steal or find another one.
Frostvale Part 1: "A Frostvale Tale"[]
The Way to the Cave[]
The hero enters Frostvale, where Maya and Blizzy are waiting him. Maya says that the moglins have been kidnapped by Icemaster Yeti for some reason. The hero starts to fight the enemy monsters making his way to Icemaster Yeti's cave.
The Cave of Glaisaurus[]
The hero accidently makes his way to a wrong cave. The hero without knowing Icemaster Yeti isn't there defeats monsters on his path finding Dragonmaster Frostscythe there. The hero quickly runs out of the cave before Frostscythe and Glaisaurus notice him.
Icemaster Yeti's Cave[]
The hero finally track the cave where Icemaster Yeti is hiding and makes his way through the monsters. The hero along with Blizzy find the missing frost moglins and Icemaster Yeti. Strangely before they meet the yeti, he was talking to a hologram resembling guy named Sepulchure. When the icemaster realizes the hero was here, he makes a deal to let the moglins go in change of the hero's items. The hero hands the items and Icemaster Yeti throws a giant snowball at him. Luckily, Blizzy got Icemaster Yeti into a trap and the Frost Moglins escape so they can heal the hero. This time the yeti is defeated so now they can go celebrate.
The Celebration[]
When the hero arrives at Frostvale all the moglins were back in their homes and King Alteon, knowing that the hero saved Frostvale, invites the hero to his Kingdom of Swordhaven.
Eyeball Attack[]
War at See![]
The hero returns to his home, Falconreach and finds out that the Irismancer commanded an army of Flying Eyeballs on the place. Unfortunately, another war comes and the hero has to defeat all the waves of monsters.
Ancient Eye Idols[]
A mission is sent by Cysero to defeat all the eyeballs in the Irismancer's lab. The hero ends up battling Gananana and finally the Irismancer. He tells the hero a lot about Sepulchure and the Doom Weapons and says he once was a hero of Lore. He also mentions that someone besides Sepulchure will be responsible for an unfortunate future. After the info the Irismancer says he was controlled by Sepulchure to do this and disappears.
The Dragon Egg Saga Part 1: The Wrath of Xan![]
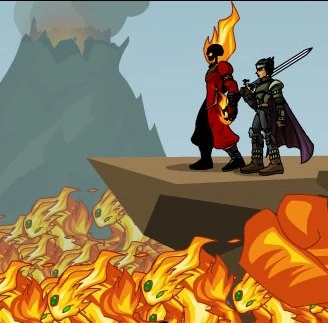
Xan commanding his army
Drakath's Favor[]
Drakath asked Xan to complete the favor owed to his father and attack Falconreach. Xan obeys him , but his army would be delayed, so he sands the Bassault as a taste of what whill come. The Hero defeats it, and finds a note in which tells that Xan will soon attack Falconreach.
Attack on Falconreach[]
Xan attacks falconreach with all of his firey minions. The Hero rages to fight them.
The Hot Gates[]
Xan defeats all of King Alteon's 299 Elite Knights and captures him. The hero knowing this, rescues the king and becomes the 301st Elite Knight (The 300th Elite Knight betrays the king and disappears).
Xan's Power[]
The town of Falconreach is eventually destroyed by Xan's forces, and none of the townspeople are harmed. The Hero tries to defeat the maniac but is badly defeated by him. The situation looks bad for the Hero, but Xan suddenly remembers about something he needed to do that concerns Warlic, and leaves the Hero to be healed by Twilly and the villagers. Everyone donates enough money to rebuild Falconreach and redesign it to look better. Twilly then reveals that he has information about the Dragon Egg which is inside the Black Dragon Box. Apparently, the Priestess was supposed to bring it to the hero.
The Dragon Egg Saga Part 2: Robina Hood[]
The Noble Thief[]
The hero meets Robina who had the box now. She tells him/her to help her out by doing some quests. The hero is asked to clear out all the bandits trying to enter somewhere that has lots of gold. The hero is asked to hunt all the monsters that are in Surewould Forest.
Opening the Black Box[]
The hero is awarded the box but Drakath and a beast called a Krakhim interrupts and challenges the hero to a battle. Eventually Drakath loses again. The hero and Robina open the box revealing that the Sneevil dumped the contents inside which is told to be the Dragon Egg in a place called the Sneevil Dumpsite.
The Dragon Egg Saga Part 3: The Treasure Hunter[]
The Sneevil Dumpsite[]
The hero visits Valencia who knows where the Sneevil Dumpsite is. The hero travels there and finds the egg. The only problem was that a Vultragon steals the egg and gives to the Ultra-Vultragon.
Egg Recovery[]
The hero goes to the Mount Mordor to recover the egg. The hero defeats the Ultra-Vultragon, but other eggs looking like the dragon egg were in his nest, and the hero didn't know which of them was the real one.
The Dragon Egg Saga Part 4: The Mage[]
Breakfast With Warlic[]
Twilly notifies the Hero that Warlic might be able to help him. The Hero enters Lymcrest through the Portal and Warlic tells him to bring the eggs. Warlic orders the hero to visit his tent and have a snack while Warlic can figure out whats going on. The hero listens to Warlic and eats one of the eggs. Fortunately, it was just a Vultragon egg. Warlic informs the hero that he needs to get Cysero's book that is in the Guardian Tower so they can know the ingredients for the spell.
Crossing the Line[]
The hero enters the Guardian Tower and searches for the spell book in Cysero's room. Cysero's room was so dirty that the chemicals in the dirt created dirt monsters such as a Dirty Sockmonkey. The hero cleans the room, killing all the monsters and finds the book that the strongest monster Boggabus was guarding.
The Gathering[]
Warlic finds about the spell and asks the hero if he can gather the Fire Yarns from the Fire Cave, the Indestructible Litter from the Earth Cave, the special type of salmon near the Waterfall Secret Cave and the Wind Nip near the Floating Cave.
Summoning Help[]
The hero finds all the ingredients and Warlic uses it to summon the Doomkitten. The cat tracks the real egg and tries to eat it. Luckily, the hero defeats the Doomkitten before it touches the egg.
The Dragon Egg Saga Part 5: The Baby Dragon[]
The Secret Cave[]
Twilly and the hero place the egg in a cave that no one except them can find. They place in a dragon stone and customize it for the future.
Arachnattack[]
After a few months of peace, the Chaos Weaver Clan and other spiders dig out from the underground to the outside. Unfortunately, they steal the Dragon Egg and another war begins.
The Chaos Weaver Web Site[]
The hero travels underground into the spider's hideout and gather many information about the clan. The spiders were sent by the Spidermancer to give a healthy meal for their queen's dead body so it can get revived.
The Spidermancer[]
The hero arrives at the Falconreach Inn and realizes that the Spidermancer kidnapped all of the people in it. The hero battles him and rescues everyone. Thanks to the hero, the Dragon Eggs are safe again.
Sepulchure's Flying Fortress[]
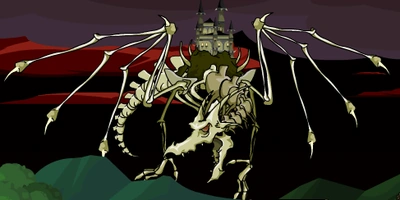

The Mighty Dracolich of Sepulchure
Ash tells the hero that he saw something very strange and no one believes him. The hero, Twilly and Ash walk to the cliff near the tower and see a dracolich flying across the sky. Strangely, on top of it was a castle which is revealed to be Sepulchure's fortress.
Meanwhile in the fortress, Drakath has given Sepulchure the White Dragon Box. It is revealed that Drakath's plan is to give both dragons to Sepulchure and he will trade him his Doom Blade so Drakath can kill King Alteon to become the next king.
The Temple of the Four Winds[]
The hero is sent on a mission to protect the wind temple from the wind monsters. After that, the hero meets the Temple Priests. They explain that the Black Dragon Box might contain the dragon that will destroy the world and the White Box might contain the dragon that is set to save the world. Therefore, the prophecy has been badly mixed up.
Legend of the DragonLord[]
The Hatching[]
The dragon eggs have hatched and the hero names it Draco. Sepulchure's dragon is turned into a dracolich and names him Fluffy.
Lady Celestia the Priestess[]
It is revealed that the Priestess is Lady Celestia. The hero is now able to customize, elementize and feed his baby dragon.
Titans of BattleOn[]
The hero is told to travel to the Circle Kave in Sunbreeze Grove. He sees a phone booth that travels throught time. Artix, Cysero and Zhoom from the future were in it and orders the hero to come with them. The hero finds out the future of Falconreach is BattleOn and its in danger. The Exodus attacked it and summoned the Exodus Titan but the hero summons his dragon in his titan form and defeats the monster.
Mad Skillz[]
Lady Celestia tells the hero to get the DragonLord armor from the Old Man of the Mountain. After defeating him, the hero asks him if he could train the hero.
Togzilla Attacks![]
Now the Priestess asks the hero to finally train his dragon into a titan dragon. The hero has to save Yokyto from Togzilla and his army of Kaiju to prove they could compete in the Dragon Arena and become a great DragonLord.
The Dragon Arena[]
The hero and his dragon compete in the Dragon Arena. They fight all the players trying to win this event and win the Dragon PvP Trophy. The hero has done all Lady Celestia's quests and she grants him to become the greatest DragonLord.
The War of Light and Darkness[]
Friday the 13th, Part II[]
Falconreach is invaded by the hockey masked undead again.
Friday the 13th, the Last Stand[]
Deadwood Destroyer comes back again and his curse is more powerful than his last one. After he gets defeated he flies away but doesn't die.
Beach Vacation Invasion[]
A wave of light monsters attack Falconreach's beach. Everyone keeps on trying to stop the army so they can relax on their summer holidays but then a wave of darkness monsters appear...
The Plot Thickens[]
In Xan's Volcanic Fortress the Necromantress and Xan plan their invasion. It is revealed that the beach vacation was just to weaken the hero. Xan was the one summoning the light monsters with his new powers. The two wizards were teamed up by Sepulchure for some reason.
Friday the 13th, Part III[]
The waves of light and dark monsters attack everywhere in Falconreach. The hero is now very weak and doesn't know if Falconreach can be saved.
Friday the 13th, Finale[]
The hero amazingly defeats the army and is confronted by Xan and the Necromantress. They summon their most powerful servants, Rotgut and Pro Pain. Rotgut is explained to be the 300th Elite Knight, the one who betrayed King Alteon. The hero defeats the servants and saves Falconreach once again.
The Spy Agent[]
Xan offers himself to report the failure and as the Necromantress leaves he informs Sepulchure that the spy in Falconreach is set. Sepulchure then allows him to continue his plan for destroying Lymcrest.
Save Lymcrest![]
The Destruction Begins[]
Warlic informs the hero that Xan has sent his elementals to attack Lymcrest and destroy it completely. Miner Thirtyniner tells the hero about a special type of lava that can turn any water source into magma and that Xan has spotted the item.
River of Fire[]
Warlic tells the hero that Xan has used the special ingredient and transformed Lymcrest's beautiful river into a sea of lava. Warlic says that Xan is trying to flood Lymcrest with the lava filled river. The hero searches for Xan and fights off his minions but Xan says he has more things to do but fight when the hero finds him so he sends his strongest fire-type monster, Bassault to kill the hero. Bassault fails and flees but Xan has already sent all his fire elemental monsters across Lymcrest.
Special Ingredients[]
The hero is sent by Warlic to find the special lava so he can experiment it and learn what are the materials to reverse its effect. Warlic then realizes that the items are a special wind ingredient lost in the Wind Mountains of Lymcrest and the special pure water in the largest lake of Sunbreeze Grove. Knowing that, the hero battles the mighty HuffPuff and Splashy to get the materials.
Miserable Past[]
Warlic arranges the plan but is interrupted by the hero trying to know Xan's past and the reason he hates Warlic. It is revealed that both of them studied in the royal Swordhaven Magic Academy. Xan and Warlic fell in love with a girl named Jaania and a few years later she got imprisoned somehow because of an evil spell. Warlic and Xan tried to save her but Warlic accidentaly pushed Xan while he was trying to free her. Xan fell in a special type of lava (the one he used to transform Lymcrest's longest river into a river of fire) and got transformed into what he is now; with a flaming skull. It is also learend that he hates Lymcrest because its citizen treated him with no respect ever since he was just three years old.
Xan's Volcanic Fortress[]
The hero and Warlic heal the river and head toward the fortress to defeat Xan. When they arrive, the door was locked and there wasn't any monsters in the fortress. Somehow, a passage opens under them and they fall into the underground of the volcano. Xan was waiting there and challenges Warlic and the hero to kill each other. The hero refuses and battles all the minions including Sunwarriors to reach Xan. The insane pyromancer says that Warlic must battle the hero or something bad will happen. Warlic seems to be an illusion and the real one appears behind Xan pushing him near the hero. Warlic tries to destroy the Pyronomicon (Xan's ultimate weapon of becoming unstoppable) while the hero defeats the pyromancer. As he dies Xan falls into the lava. Warlic tells the hero that he couldn't destroy it and they leave as the volcano errupts.
The End?[]
After the defeat, Xan used his last powers to fuse with the volcano! Lava Titan Xan is born and proceeds to summon an army of Bassaults. The hero summons his baby dragon and turns it into a titan dragon with the power of his Dragon Amulet and defeats Xan once again.
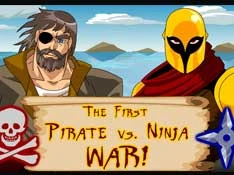
Pirates Vs. Ninjas Saga Part 1: War for the Wind Orb[]
Gorgok Returns[]
The hero has heard that Gorgok healed himself completely and is on the way to Falconreach with an army of Dravirs. The hero travels to Gorgok's cave and defeats it with his titan dragon. After stopping Gorgok again, the hero finds a note about the wind orb. It says that the pirates and ninjas are about to have war to get this item.
Water Breathing Potions[]
The hero travels to Osprey Cove in Sho'Nuff Island and meets the pirates there. First Mate Rhubarb asks the hero if he wants to become a pirate and capture the Wind Orb (the pirates call it the Wind Pearl). The only way is to retreave the Water Breathing Potions that the ninjas have stolen. The hero is sent to a pirate ship that ninjas have raided. After defeating the Shadow Jodan, the hero gets the potions out of the ship but because of the ninjas' trap Rhubarb's ship is blown up.
Ruins of Kordana[]
"Let me ask you this, in YOUR reality...does Artix still slay undead?" - Kordana
The Hero is sent to an unknown place in Sho'Nuff Island called Ruins of Kordana. Rhubarb says that this is the place where the Wind Pearl is. The Hero defeats the defense system, controlled by Kordana's special computer known as the Vend-Tron 3000. When the hero meets Kordana, she says that Drakath stole what the Hero was looking for. She also reveals that she comes from MechQuest's reality, and that the universe had to be reset for some reason. She apparently knows Artix and Cysero, whom she calls "Sys-Zero". Since the Hero destroyed all the other robots in the ruins, Kordana will have enough energy to last for another few thousand years. The Hero thanks her and vows to retrieve the Wind Orb from Drakath.
Pirates and Ninjas Attack![]
A pirate standing against a ninja
Not knowing who Drakath is, Captain Blackberry blames that he's a ninja and the ninja's leader responds to the attack so a war between the two clans begin.
Thyton's Informations[]
While the hero takes a break in one of Sho'Nuff Island's beaches, Thyton the Elite Jonin of the ninjas and the Hokage's most loyal ninja gathers information about Drakath. He tells all the ninjas including the Hokage that Drakath is the leader of all bandits, the tyrant ruler King Slugwrath's only son and wants to rule Lore because King Alteon killed him in the Great War so that he could bring peace to Lore and become the king. Drakath thinks that he is the rightful heir to the throne and doesn't want anything in his way.
Pirates Vs. Ninjas Saga Part 2: The Orb's Thief[]
Box of Ninjas[]
The hero is sent by First Mate Rhubarb to the dojo of a devil fox named Okuchi No Okami. Rhubarb says that his Elite Sneenjas know everything of Sho'Nuff Island and where the Wind Orb can be. The hero meets Okuchi No Okami holding a box that contains thousands of Elite Sneenjas and was about to release it. It is explained that Okami was once a classmate of Thyton and the Hokage promised him that he would become the Elite Jonin of the Wind Village. Things turned out to be that Thyton grew stronger and he became the Elite Jonin. Okami was so angry he caused a jutsu that he thought would make him more powerful but he got transformed to a devil fox. The hero is defeated by Okami but a pirate calling himself Agent 69 helps the hero defeat Okami. The devil fox flees with his box leaving a waste of time for the hero.
Captain's Orders[]
Drakath using the power of the Wind Pearl
Captain Blackberry tracked Drakath and orders the hero to find him and take the wind pearl from him . The player finds him, but Dakath uses the power of the wind orb to defeat the player. Darkath is then taken by the Wind Orb, leaving the player behind.
Red Betty's Spell[]
The hero sadly travels to the Red Betty, wanting to say that he failed. The hero sees Captain Blackberry and says that he captured Drakath. The hero was surprised that the captain already got Drakath but the captain says have fun with him or else. Drakath battles the hero and says the captain already has the Wind Orb. Captain Blackberry explains everything about what he is planning to do. Its revealed that he wanted to become the God of the Eight Seas. He needed the Wind Orb to use the spell that was a curse in the Red Betty. Blackberry knew about this 20 years ago when he was just a sailor and it was his dream to rule the seas. The captain transforms himself into a half-human and half-braken type creature, calling himself Brakenberry. The hero offers help from Drakath but he vanishes leaving no help for the hero. Eventually Brakenberry dies and First Mate Rhubarb becomes the new captain known as Captain Rhubarb.
Something Fishy[]
Unfortunately, something wrong happens. The Wind Orb is dropped to the sea after everyone leaves the ship and Brakenberry who just got drowned grows stronger. He transforms into King Braken and does become the God of the Seven Seas. The hero tries his best to protect Osprey Cove and summons his dragon to fight. After King Braken is dead and the Wind Orb dissappears. Because of all this ,the pirates and the ninjas are friends again but there is something strange happening.
Pirates Vs. Ninjas Saga Part 3: Hunt for the Orb[]
Run of the Kessel![]
The hero travels to the Shadow of the Wind Village. He asks Thyton so he can become a ninja but Thyton says the only way is to retreave the Fire Walking Potions from a deserted island that the pirates have raided. The problem is that the pirates have surrounded the entire area so Drakath wouldn't steal anything again. The hero thinks of an idea to use the Kessel, the strongest ship the ninjas have, so they can to travel to the coastal land. After raiding all the pirate ships, defeating each Buccaneer and collecting the potions the hero is a ninja.
The Hunt Begins[]
The hero returns to the Ruins of Kordana to find more information about Drakath's location. Kordana has detected Drakath at Okuchi No Okami's base.
Return of the Scrolls[]
The hero goes to Okuchi's camp, defeating some sneenjas in the process. Okuchi tells the hero that Drakath is at the Fire Cave, and offers to set a trap of Drakath in exchange for keeping the scrolls. The hero refuses and battles Okuchi, defeating him once again.
Walk Through Fire[]
The hero uses the fire walking potions to enter the Fire Cave and finds Drakath. Unfortunately, he uses the power of the wind orb to defeat the hero once more. Drakath then disappears in a whirlwind, leaving the hero in shock.
Jewel of Four Winds[]
The hero returns to the Shadow of the Wind Village. Thyton informs the hero that Drakath was in the center of the village, and Okuchi was attacking. The hero defeats Drakath, but unfortunately, Okuchi takes the orb. He explains that while Drakath was in his camp, he had spied on him and learned how to use the wind orb. He had unlocked the power of the wind scrolls and knows how to bring the giant with iron fists, Honda, under his command. Agent 69 throws a knife in the orb, but fails to destroy it. The hero requests Drakath to help him, but Drakath refuses and vanishes. Nevertheless, the hero defeats Okuchi.
Honda's Accord[]
The Villagers heared strange noises in the forest. The noise was made by Honda , the giant with iron fists . Thyton said he should be a friend of the ninjas , but it seemed that Okuchi turned him on his side . The Hero summons his Titan Dragon and defeats Honda, saving the entire villiage. He then makes Honda turn into a car and drives back to Shadow of the Wind Village where it disappears.
Frostvale Part 2: "Out in the Cold"[]
Frostvale Under Attack[]
Again some ice monsters atacked Frostvale. No moglin has been captured, but they were going from the Yeti Cave. Chilly didn't believe the Icemaster Yeti, but one thing is sure: it must be someone loyal to Sepulchure.
Quest for the Fire Gems[]
The hero goes to Frostscythe to find if he is behind the war, and fights him and Glaisaurus, that was supposed to be dead. Frostsythe informs The Hero that he have an army of little dragons in training, and once he has his third dragon amulet he will be undefeatable.
Icemaster Yeti in Frostvale[]
Chilly asked the hero to follow him and leaded him to a chamber. Chilly said that Icemaster Yeti is good now. Icemaster Yeti said that when he captured them, Chilly always said his papa will save him. But Icemaster Yeti didn't believe him until the hero and Blizzy showed up. The monsters where after him because he joined Sepulchure only because he is afraid of him, and when Sepulchure discovered that the moglin's healing powers didn't work on undead, and the moglins made healings weapons for the Hero, Sepulchure was in trouble. He now wanted to finish the moglin's healing magic forever, by ending Frostvale. Icemaster Yeti went from door to door, and the villagers screamed, but the hero and papa moglin calmed them down. The village decided to not let Icemaster Yeti stay, but Icemaster Yeti could hide on his own. The Hero is then informed that the army was led by Xan.
Frostvale Ghosts[]
"...Did...did Artix just exorcise the ghosts of Frostval Past, Present and Future?"
"Not in that order, but yes." - Chilly and the Hero
The Frostval ghosts of Past, Present, and Future (rather comically, player avatars from MQ, DF, and AQ) visit. They warn the hero and Chilly that if they do not defeat Xan, Lore is doomed. The apparitions intend to bring out the "Frostval Spirit" inside Xan, stating that that's "kind of what they do". Unfortunately, Artix suddenly rushes in and exorcises the ghosts, much to the hero and Chilly's shock. He leaves before they can protest. This leaves Frostvale's fate entirely up to the hero.
Xanta Claus's Lair[]
The army is defeated. The Hero enters the Yeti Cave, where they encounter Xanta Claus. Xanta Claus states that when he fell into the lava, Sepulchure saved him. The Hero asks him how he lives with his ice powers, since his fire was the only thing that kept him alive. Xanta Claus informs the hero that he now has the Eggnognomicon, an ice version of the pyromonicon. Icemaster Yeti aids the Hero, and together they defeat Xanta Claus. The Hero wants to arrest him, but their battle causes the ice to melt, making Xan fall. He lives.
The Celebration[]
For saving Frostvale, Icemaster Yeti is forgiven and is made the honorary protector of Frostvale.
Pirate vs. Ninja Saga Part 4: "The End of the Wind Orb Showdown !"[]
Fluffy as a Dracolich[]
Sepulchure has a Dragon Amulet, and now he wants to destroy the only thorn in his side... the Hero. Sepulchure informs the Hero and his dragon that he wants the elemental orbs for making the greatest power on the World of Lore. The Hero says that he will defeat him, but the Doomblade reveals that Lady Celestia didn't tell the Hero that the Prophecy was broken, because the good dragon was now corupted by Sepulchure's dark magic. Also, the evil dragon was under the command of the Hero. Sepulchure says that the only thing that the evil dragon will do is to destroy the world, and Fluffy will help him. The hero summons his titan dragon and fights Sepulchure.
No Hope?[]
Sepulchure overpowered and defeated the hero. He wanted to kill him, but the Doomblade says that THE MASTER wants the hero alive. Sepulchure obeys it, and lets the hero live. Now, the hero knows what kind of power Sepulchure possess.
The Sandsea Saga Part 1: "The Tyrant"[]
Meeting Zhoom[]
The Hero goes to the Sandsea, where a masked fighter, member of the rebelion against the mad emperor (Sek-Duat XV), asked him the join them. The rebelion member knows the location of the Light Orb, and knows the Hero's name. When the rebelion member wanted to show the location of the Light Orb, a rider, looking very dangerous, named Zhoom, "arrested" the rebelion member, and thanked to the hero for distracting him. The hero accepts the offert to work with Zhoom, only to rejoin the rebelion.
The Hard Way[]
Zhoom sent the hero to hunt an elusive member of the resistance. The hero fights monsters, until he finds Kasuf! The hero tries to help him, but the only way out was where Zhoom was, except for another, dangerous and puzzled way. The hero clears the monsters and traps from the other way, and lets Kasuf escape. Kasuf informs the hero that, if he gets a blue lotus, he should take it to the inn and gets in touch again with the rebelion, that will show the locaton of the Light Orb.
The Blue Lotus[]
The hero goes to the desert and finds the blue lotus, the rarest type of lotus in the Sandsea.
The Oasis Inn[]
The Hero goes to the Oasis Inn, where Kasuf's daughter informs the hero that Sek-Duat knows the hero works with Zhoom, and, if he slays the mummified dragon from the Dynasty Tomb, he could enter the palace and take the Orb. After defeating some desert thugs, they find that Drakath put a bounty on the hero's head, and everyone wanted to collect it.
Dynasty Tomb[]
The hero went to the tomb to slay the mummy dragon and defeats it.
Damien's Draft[]
The hero goes to the Mayor Hall, at Damien. The hero finds a secret passage, and enters it. There it finds a Chaos Weaver, that said they shall destroy Falconreach with their new machinery. The hero defeats them, and battles the Unicougar at the end.
The SandSea Saga Part 2: "Emperor's Request"[]
Emperor's Invite[]
Zhoom informs the hero that Sek-Duat sended him a invitation to his Sun temple. The hero heads there to meet Sek-Duat.
The Sandwitch[]
Sek-Duat asked the hero to defeat the Sandwitch, the wicked yaga. She captured villiagers in the middle of night, and they never came back. The hero meets the first Sandwitch illusion, who says she isn't evil, and fights the hero. The second illusion says that people come to her tomb to escape from the Sandsea. The third illusion says that the yaga kicked her because she wasn't wicked. The real Sandwitch tells that Sek-Duat wants her dead because she stole a book that raises undead. He wants to use the necessary ingredients and the orb of light to raise his first ancestor, so his tyrant rule never ends! The hero asks the Sandwitch to hide, and then leaves.
The Traitor[]
Sek-Duat sends the Hero to meet the traitor: a defected rebellion member but the Hero finds Kasuf: he was the traitor! He wanted to meet only Zhoom, because Sek-Duat needs 100 souls of people who calls him "enemy", and he wanted to reveal their location to protect her daughter. He wanted to make Sek-Duat believe that Zhoom is one of the rebels, and be killed by the... Anubis Knight. Now the Hero should meet the same fate, but the Hero defeats the Anubis Knight, and tells Kasuf to never betray the rebellion again.
Zhowndown[]
Sek-Duat sends the Hero to kill Zhoom, telling him that he works with the rebels, and that he is at the lizard prison, and wants to get the key to save the rebels. When arriving there, Zhoom says that Sek-Duat knew that the Hero was working with the rebels, and that he is loyal. The Hero defeats him 3 times, every time trying to convert him to the rebel side. After the third defeat, they both meet a Sphinx beast, that said it was going to kill both, seeing how Zhoom is over payed. The Hero, having Zhoom on his side, defeats it and save the prisoners.
Sek Duat Lives Again[]
Zhoom joins the hero in an epic fight to retrieve the Light Orb from the wicked emperor. After defeating Sunspikes and an army of Anubis Knights, they reach Sek-Duat and his Light Orb. Sek-Duat the Fifteenth reveals that he is himself Sek Duat the First, a lich this entire time. The yaga curse was to be used to bring himself back to life, so he didn't have to be a lich forever. After you defeat Sek-Duat, the hero decides to put Zhoom in charge of guarding the Orb of Light.
Sandsea War[]
Sek-Duat captured all the villagers from the Sandsea, planning to sacrifice their souls for his immortality. The hero defeats the army, and finds that Sek-Duat called The Dunelord to eat the rest of the villagers. The hero calls his titan dragon and battles the Dunelord. After that, Sek Duat's power is greatly dismished, but he is still a threat for all the rebels.
The Necropolis Saga part 1:"Town of Moonridge"[]
Note from Noxus[]
The hero finds a letter in Falconreach, that was challenging him to go to Doomwood. The letter was from Noxus, the head necromancer Artix warned us about. The hero goes straight to the city of Moonridge, the next target of a undead army.
The Town of Moonridge[]
The Purple Necromantress has attacked Moonridge: the last town resisting the evil of Doomwood. The hero, at Artix's orders, attacks the army of undead.
The Necromantress[]
Artix, the Hero, and Zorbak talk to the Necromantress and she releases her Senior Project, the Alpha Abomination, on them.
The Celebration of Moonridge[]
The Mayor of Moonridge arranged a party to celebrate the victory. He gives the Hero and Artix the Town Key, but Lady Vayle enters the scene, and tells them they are strong. Hearing her name, Artix finds that he knows Vayle, whom he met when he was just a little boy. Then an undead rises from the ground, but the Hero defeats it.
The Necropolis Saga Part 2: Inside the Necropolis[]


Noxus , Dean of the Necromancer Unniversity
The Outcast[]
The Hero and Artix went to Zorbak, he was a student of Necropolis but was expelled. After saving him from an undead tortoise, he gave them his old student ID.
The Gatekeeper[]
The Hero and Artix go inside the Necropolis. They show The Gatekeeper the ID card and he lets them through, but Artix can't let evil go unpunished and he attacks The Gatekeeper, causing him and the Hero to go through a tough battle.
The Body Shop[]
The hero and Artix plan to destroy the body shop (where they make the undead). They pretend to be necromancers and make their own undead but their lack of control creates a dangerous battle (in the battle the body shop is destroyed).
Ice Creamatorium[]
The Hero and Artix goes to the Ice Creamatorium, where they find that the necromancers plan to use an army of undead food in order to finish all farmer's grains. Using the Holy Wasabi, the Hero and Artix destroy the Ice Creamatorium.
The Green Mist[]
Artix tells the player his story: he was a young boy that lived in in Doomwood. He was chopping wood until he heard someone calling for help. He ran to the river, and saw a young girl clinging to a rock in the river. Artix tried to save her, but he fell in the river. He woke up in a cave, with the young girl. The young girl reveals to be Vayle. They follow a tunnel, and find the Darkness Orb. Vayle touches it, and wings grow on her back, but Artix turn his back on its power. Then they return to the village, where Vayle's brother blames Artix because wings grew on Vayle's back. A green mist raised, and undead destroyed the town. Artix escaped, and thought that Vayle was dead. He was found by Lady Celestia, that helped him. Then he joined the Paladin Order.
Artix vs. The Undead[]
The Hero and Artix found the Necromantress, and fought her "new creation", Edgar. The Necromantress is then revealed to be Vayle, and Edgar was her brother. She believed that necromancy is the key to revive her brother, and even through Artix thwarts her, she is still positive on her beliefs, and vanishes.
The Necropolis Saga Part 3: Friday the 13th, Part IV[]
Atack on the Necropolis[]
It's Friday the 13th again so the undead have been flooded with power. This time however, the heroes of Falconreach turned the tables by bringing the war to the undead. They destroyed the undead army (the players took out 50 million and Artix the other 50 million). The hero and Artix then defeated the Strangeknight that Lady Vayle (The Necromantress) summoned to kill them.
Toys 'R Dangerous[]
The Hero goes in a special mission where he defeat evil dolls and finds a girl that wanted to keep them.
Noxus Fumes[]
The Hero and Artix go to Noxus' office, where he confirms that he is responsible because of the undead that atacked Vayle's village and that necromancy isn't the way of reviving Edgar. He explains that Vayle became the Elemental Orb of Darkness when she touched it as a girl and that he has been using the possibility of resurrecting her brother to control her. Vayle hears him, and joins the Hero and Artix, and defeat Noxus. Vayle leaves saying that she will continue trying to resurrect Edgar through necromancy and that if they meet again it may be as foes.
Extra Credit[]
When Artix was wandering through the abandoned Necropolis he accidentally released the Skeletitan, a giant beast that some students were working on as an extra credit project. He fought it but only made it mad. The Skeletitan then made for Moonridge. Luckily, the player summons his titan dragon and defeats the remaining Necropolis student's creation.
Pirate vs. Ninja Pranks[]
Monkey Business[]
The owner of the Shadow of The Wind Village Inn, Pi Mae, decides to play a prank on Mae Pi, the owner of the Inn in Osprey Cove. He gives the Hero a box full of ninja monkeys to leave in the inn. The Hero defeats several of Mae Pi's pirate monkeys and leaves the box in the inn. The ninja monkeys break out and sabotage the inn.
The Gift[]
Mae Pi was annoyed by Pi Mae's prank and decides to return fire. He gives the Hero a "gift" that he wishes to give Pi Mae. The Hero defeats several of Pi Mae's ninja monkeys and leaves the gift in his inn.
Bad Bananas[]
The gift that Mae Pi sent to Pi Mae was a pie. Pi Mae considers it a insult and puts the Hero to bring many bananas in the inn. The Hero puts all the bananas in the inn and the monkeys eat and fart into the inn.
Water You Doing[]
Mae' Pi is angered by Pi Mae's prank and gives the Hero to put an Air Breathing potion into the inn. The Hero puts it there, making water elementals come into the inn, and the hero must fight them. Then the inn is ravaged by the water elementals, and a ship goes on the inn.
War of the Monkees[]
The monkees of Sho-Nuff Island were tired of being bossed around by the people so the wisest of the monkee sages cast a spell and turned everyone on Sho-Nuff into monkees. The pirate and ninja monkees got then started a war. Even the hero himself was a monkee! Eventually, the pirates came out on top.
Monkee War Showdown[]
The victorious pirate monkees decided they want to run the Osprey Cove Inn themselves. They hire the Hero to take out Mae Pi and he does so. Mae Pi is angry, and so hunts down Pi Mae. He finds him and they are about to battle when their parents show up and calm the feud. They are in so much trouble.
Dragesvard Saga Part 1: The Ice Elf Civilization[]
A Cold Reception[]
Galanoth sends the player into a cave that was once home to a dragon. After fighting several monsters, the player found a lock that had the images of Galanoth parents.
Un-BEAR-able Cold[]
Galanoth sends the player to a recently destroyed settlement. There the player finds a strange weapon that once belonged to an ancient civilization called the ice elves.
The Ice Elf Ruins[]
The Hero and Galanoth accidentally discovered the city of the ice elves. The alarm rang and Galanoth stayed so that he could discover something about the ice elves.
Not So Great Escape[]
The Hero lets the ice elves capture him so that he could free Galanoth. After escaping the city, Galanoth tells the player that the new Ice Elf queen, Aisha is planing to launch an attack on Dragesvard and that they must forge alliances with the other North tribes.
Dragesvard Saga Part 2: Forging Alliances[]
The Killguin Arena[]
The Hero is sent to convince the killguins to join forces with the humans. After beating the challenges of King Linus, the killguins agree to join forces with Dragesvard.
Bear Facts[]
The Hero is sent to forge an alliance with the Ursice Savages. After meeting the Ursice shaman, the shaman tells the Hero that the only way the bears would agree to join forces with him is that he offers to them a picnic basket. After getting one, the ursice leader agrees to join forces with Dragesvard.
Tusker Objective[]
Galanoth sends the player to his tusker contact. The contact tells him that if he convinces the tuskers that if Aisha wins they would lose their privacy, the tuskers would surely join him. After making his way through the cold waters, the Hero finds the tusker leader and convinces him to join Dragesvard, but not before they tell him that Aisha is controlling ice dragons.
Ice Fields[]
The Hero convinces Galanoth of allying with the dragons. After fighting several monsters, the Hero and Galanoth meet two ice dragons. Suddenly, Aisha appears and reveals the player that she is in possesion of the Ice Orb and plans to use it to transform Lore into a giant Ice ball so tat the ice dragons can conquer all Lore, but most importantly, that she is in fact... A DRAGON!!! Aisha leaves after sending her dragons to beat the Hero, but they are defeated.
Dragesvard Saga Part 3: Ice Dragon War[]
Dragesvard War[]
Aisha's army atack Dragesvard, but the alliance of the Dragesvard people, Killguins, Tuskers, and Ursice Savages defeat her army.
Gary's Fate[]
After failing so many times, Gary is turned into General Sharthallis', leader of Aisha's army, pet, whose job is to heal him with potions when he is wounded. The Hero defeats the dragon and saves the day.
Confrontation with Aisha[]
The Hero confronts Aisha, defeats her, and reclaims the Ice Orb.
Olaf's Party[]
The Hero comes to Olaf's Party, where Aisha, who transformed into a dragon, trapped them by freezing their pool. The Hero summons his titan dragon and defeats her. Galanoth learns that not all dragons are evil.
Nythera's Storm[]
The 12 Labours of Zeuster[]
The Search Begins[]
He's (a) Lyin'[]
Zeuster sends the hero to kill the nemean lion, a enemy of Zeuster which didn't considered him a true god.
Purubred Protests[]
The hero/heroine goes to stop some birds from singing {mostly furries} because Zeuster was annoyed by their song. He succeeds in the end.
It's a Wash[]
Archimoodes tells the hero that you have to wash Chick Moo-Fu, a temple dedicated in worshiping Zeuster. The apprentice magepriests, the chickcalves, were very messy and it was a hard task to clean after them. The hero goes to fetch some water to clean the temple.
Heart of Gold[]
Outnumbered[]
(Mino)torture[]
The hero has to go to the Minotaur's labyrinth, and face the creature itself.
No Horsing Around[]
Forge Frenzy[]
Don't Have a Kow[]
Queen of the Jungle[]
The hero has to get something from the Queen of the Jungles to Zeuster. By failing to impress the queen with the gathering of some things from her jungle, the hero has to battle her.
Triple Threat ?[]
The hero must go to the realm of Death and bring back the guard dog of the Underworld. The hero brings back a puppy guard dog, but Zeuster is not happy with this result.
A Titanic Task[]
Inside the Garden[]
The Secret[]
Grrrberus' Revenge[]
Popsrocket Saga[]
Colorless Quest Chain[]
Never Say Dye[]
The 1st Quest in this quest chain
Dye Another Day[]
The 2nd quest in the quest chain.
Live & Let Dye[]
The final quest in the quest chain.
Fire War Saga Part 2 (Fire War)[]
Drakonnan has become even more powerful and you have to stop him. From here on the fire minions become stronger. One quest will take real courage to beat. Another you depend on other players to help you.
Fall of Drakonnan[]
With the help of Zorbak, the hero/heroine and the others enter Darkonnan's lair and rescues Alina, Reens and Tomix. The hero/heroine then battles Drakonnan, who is defeated. Blinded by madness, Drakonnan attacks the heroes, but falls into the lava. Zorbak throws the Fire Orb at him in an attempt to receive his throne, which mutates Drakonnan into Titan Drakonnan, which the heroes defeat, and he falls again into the lava. Zorbak takes his helm as a prize, but the orb is nowhere to be found.
"The End?"
Epilogue[]
While the Orb is still nowhere to be found, Nefaria the Fire Spirit takes Drakonnan from the depths of the lava and brings him to Sepulchure's Dracolich Fortress. It reveals that she gave, Caelestia, Akriloth's son, her own "little gift" to her, and that she manipulated everything from the start. Nefaria turns out to actually be Sepulchure, and holds the Fire Orb. He then states that he is going to break Drakonnan piece by piece to find out how he absorbed more energy than anyone from the Fire Orb.
Zorbak's Legion[]
Zorbak's Legion[]
As Zorbak transforms the dracoliches into his own army, he appoints the hero as their "nana". The hero accepts because he didn't want anything to happen to the cute hatchlings.
Zorbak's Hideout[]
Zorbak wants his own hideout, and tried to steal one. But when the dracoliches tear the place apart, he renounces at the new lair.
AmityVillian[]
Zorbak calls the hero nanny.
Double Trouble[]
Zorbak goes to get aid of the yagas, but they do not accept his offer.
Seeking Queen[]
Zorbak seeks the aid of Queen Safiria the vampire queen, but she refuses, saying she has her own plans.
Gild the World Gold War[]
As Good as Gold[]
Baron Au'Mydas, a man obsessed by gold, was counting the treasury of King Altenon. He was furious that the gold wasn't his, and it was the king's. But when the Irismancer comes, promising him great fortune if he keeps the heroes occupied, he accepts, asking for gold coins. But as the Irismancer transforms him into essence of gold using the power his master gave to him, the Baron is able to transform everything he kisses into gold. As Au'Mydas creates an army of gilded monsters, he starts a war.
Gold War[]
As Lukkhi the Snevilchaun helps the hero into fighting the army of golden monsters, as gold wouldn't be worth anything if everything would be made of gold , the hero began fighting the gilded army.